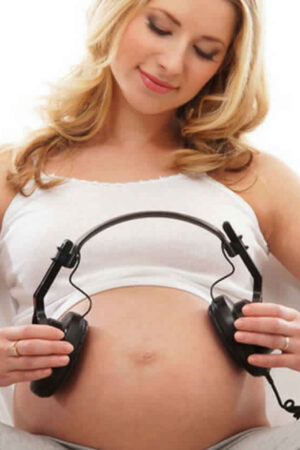


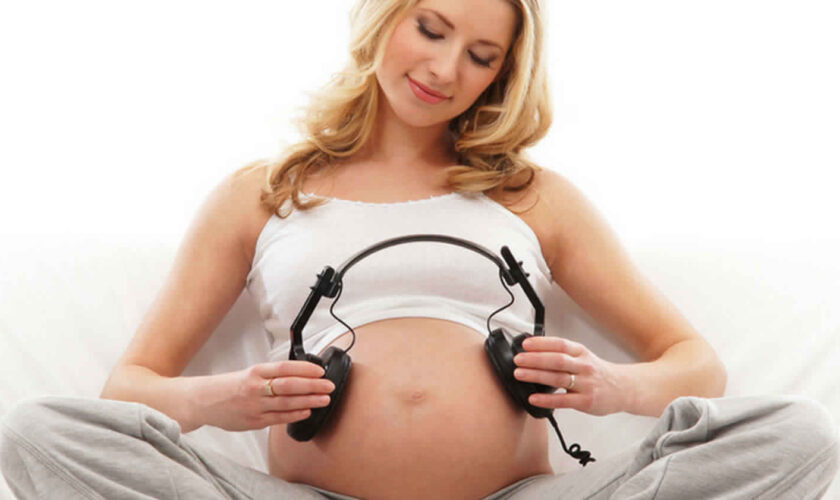
Music for baby in womb
The human brain is both wired with innate music abilities and shaped by music experience, starting in utero and continuing across the lifespan 1). A growing body of literature from music therapy, music cognition, musicology, neurosciences, and affective and behavioral sciences target fetal and neonatal life, shedding light on the emergence and early development of sound and music perception. However, the great variability present in the literature in terms, for example, of type of music exposure, means of music administration, or age at exposure, has not yet allowed a clear understanding of how music experience impacts and shapes the human infant brain in the context of early neuroplasticity 2).
The wide effects of music on brain function, encompassing auditory perception, language processing, attention and memory, emotion and mood, and motor skills, have suggested the use of music as a therapeutic tool in neuropsychiatric patients, including young infants at neurodevelopmental risk. Several systematic reviews and meta-analyses have examined the therapeutic role of music in preterm infants at neurodevelopmental risk, with inconclusive results, mainly due to the variation in study quality and methodology 3). In most cases, the effects of the intervention were assessed in relation to cardiorespiratory parameters, growth and feeding outcomes, length of stay, effects on behavioral state, or pain. Much less is known on the effect of music intervention on direct measures of brain function and structure or on short- and long-term neurodevelopmental outcomes 4).
The effects of a music interventions—both live or recorded, administrated by parents or trained specialists—on very preterm infants with severe health complications or with very immature brains are currently unknown. Most of the studies in the previously reported systematic reviews and meta-analyses evaluating the effects of music interventions are limited to stable preterm infants. Moreover, music experience for preterm and full-term infants has to be accurately planned with a trained developmental specialist. Similar to all of the early interventions delivered in the neonatal intensive care units (NICU), the music administration should consider infant needs and behavioral state. There is no evidence demonstrating that a specific music (i.e., Mozart Sonata) is beneficial per se for every infant and without an individualized and intentional professional intervention 5).
Every music intervention should respect the sound level guidelines for NICUs. The guideline was published by the American Academy of Pediatrics recommending for the combination of continuous background sound and operational sound to not exceed an hourly equivalent continuous sound level of 45 decibels 6).
The types of music that have been tested and most frequently reported in systematic reviews include a limited pitch and dynamic range, an absence of sudden change (increase or decrease) in intensity, a slow tempo, and frequent repetitions.
Live music, directed to an individual infant 7), either administered by singing parents or supported by professionals, is primarily suggested as an early music intervention in the frame of environmental enrichment and infant emotional development 8). A recorded music administration should follow the principles of increasing in structure complexity and individualization to infant’s reactions. With the increase of age, following a careful individual observation, the administered music can present further degrees of acoustical complexity, such as multiple instrumentation, a moderate degree of variation or length 9).
Early in gestation—at around 16 weeks, the fetus’s auditory system is formed 10). Between the 26th and 30th weeks, the fetus is able to detect and react to sound stimuli 11). This period in the womb is considered to be a critical period for neurodevelopment 12). Development of neural networks in the perinatal period is highly dependent on the intrinsic and extrinsic multisensory activity driving maturation of neuronal circuits 13). In particular, music during prenatal and early postnatal period in rats has been shown to modulate brain development in improving learning capacities 14). Music induces activity in limbic (e.g., amygdala and hippocampus) and paralimbic structures (e.g., orbitofrontal cortex, parahippocampal gyrus, and temporal poles), regions implicated in emotion generation and regulation and might therefore influence the maturation of socioemotional development 15).
Vandormael et al. 16) discuss how the “fine-tuning process takes place in the uterus where both internal (e.g., respiration, heart rhythm, and digestion) and external sounds (e.g., voices and music) can be perceived”. They also cite significant recent research in numerous neonatal intensive care units (NICU) conditions showing evidence that too much chaotic noise or not enough sounds, largely people’s voices, may have detrimental, or deprived conditions which can show up in delayed language capacity in toddlerhood 17). In a recent review, results of 512 preterm infants among 15 recent clinical trials using live and recorded maternal voice interventions showed fewer cardiorespiratory episodes and significant improvement of physiologic and behavioral conditions 18).
Few studies investigated through neurophysiological techniques the effects of fetal exposure to music. In one study, fetal exposure to a simple recorded lullaby presented 5 times per week starting from the 29th week of pregnancy until birth was compared to controls. The exposure group had significantly stronger amplitude event-related potential (ERP) responses at birth and 4 months that also correlated with the amount of prenatal exposure 19). This indicates that prenatal music exposure has an effect on the neural responsiveness to sounds several months later, supporting a sustained effect of fetal memory through early infancy.
In preterm-born infants, amplitude-integrated EEG (aEEG, a restricted channel, compressed display EEG) has been utilized to investigate the effect of recording music on sleep-wake cycles, reporting positive effects of music exposure on quiet sleep in hospitalized premature infants 20). More recently, amplitude-integrated EEG was used to study the effect of Brahms’ Lullaby on the sleep-wake cycle of low-risk preterm infants between 33 and 37 weeks of gestation, reporting fewer interruptions of quiet sleep and increased postconceptional age sleep patterns as the result of music exposure 21). The results, however, were called to be read with caution due to the potential conceptual flaws in the interpretation of the findings presented by the authors 22).
A recent study of 35, <32 weeks gestational age neonates revealed that those who listened to 8 minutes of pre-composed music five times per week, based on nursing assessment of developmental need (assessed on a neonatal behavioral assessment scale), timed to be offered at the moment and distinctly related to need of sleep, wakefulness-interactive, or at a time of alertness, such as prior to feeding, led to functional brain architectures (shown through fMRI) that were more similar to those of full-term newborns 23). This provided their evidence for a “beneficial effect of music on the preterm brain.” This example of identifying the timing of a music intervention is quite indicative of sensitivity to best practice needs and might provide a unique platform for the inclusion of the infant’s state and readiness for music, suggestive of a dynamic aspect of signal reading and its importance when providing intervention for the music applied.
However, the music intervention, and its meter and instruments “composed of a soothing background, bells, harp, and punji (charming snake flute) five times per week from a gestational age of 33 weeks until the MRI” may not provide aspects related to the most efficacious provisions of the music itself. Unfortunately, readers are not provided with the music applied-and when one seeks to gather the evidence and arrives at the website 24), the original music provided for this referenced study is not easily found.
In a recent study, of 272 infants born prematurely, and serving as their own controls within a randomized 2-week intervention period in 11 hospitals, when exposed to entrained music therapy conditions, either in parental or music therapist singing conditions, vital signs improved 25). Implementing song of kin; parent-selected familiar melodies, or improvised to create in-the-moment, meaningful lyrics, within a simple melodic construct, or using womb sounds simulated through the use of a quietly entrained Remo ocean disc, sleep patterns were enhanced, and heart rate patterns were more even (regulated) and soothed (promoting sleep) 26).
Examining the mother’s voice, and recordings of her heartbeat sounds have shown auditory cortex improvement 27), at 1 month in 40 infants born extremely prematurely (between 25- and 32-week gestation). Newborns were randomized to receive auditory enrichment in the form of audio recordings of maternal sounds (including their mother’s voice and heartbeat) or routine exposure to hospital environmental noise. They were shown to elicit strengthened auditory plasticity at 1 month compared to their controls. This study again used recorded sounds that were static, and not meeting the meter or condition of the premature infant’s signals in the here and now. However, the organized sounds (music) and familiarity rendered better outcomes when compared with noxious hospital noise 28).
Entrainment means synchronization of the beats of music with natural body function or processes. A recent study of five infants with congenital heart disease explored entrainment on the physiologic measurements of withdrawal through live singing and guitar accompaniment. This single case withdrawal pilot study examined the effects of music therapy “entrainment” on heart rate, respiratory rate, blood pressure and oxygen saturation rate, of five infants suffering from congenital heart disease, in the cardiac intensive care unit. Receiving music therapy “entrainment sessions” before and after heart surgery, and consistently, 3–5 times a week for up to 3 weeks, their physiological measures were recorded every 15 s after the music therapy intervention began, until 20 min after the intervention was complete. Although the outcomes showed improvements when “entrainment” was used from baseline to follow up, the songs implemented, when not informed by parents did not necessarily consider range, melodic content, nor musical elements. The entrainment was matched with the guitar accompaniment (many strings) rather than the singing (single-toned phrase). A metronome was instituted, which produces a static rhythm, likely not providing sensitivity to the actual shifts of heart rhythms that one would advantageously follow to match the infants’ rhythmic heart rate changes moment by moment 29). Even so, the study had an 80% success rate, whereby four of the five infants experienced decreases in average heart rate and respiratory rate and improvements in the derivative of the heart rate signal as well.
Neonatal intensive care units (NICU) around the world increasingly use music interventions. Recent systematic review of randomized controlled trials (RCTs) that 20 included studies encompassed 1128 participants receiving recorded or live music interventions in the NICU between 24 and 40 weeks gestational age. Twenty-six different outcomes were reported which were classified into three categories: physiological parameters; growth and feeding; behavioral state, relaxation outcomes and pain 30). Live music interventions were shown to improve sleep in three out of the four studies and heart rate in two out of the four studies. Recorded music improved heart rate in two out of six studies. Better feeding and sucking outcomes were reported in one study using live music and in two studies using recorded music 31). Although music interventions show promising results in some studies, the variation in quality of the studies, age groups, outcome measures and timing of the interventions across the studies makes it difficult to draw strong conclusions on the effects of music in premature infants 32).
Music and Executive Functioning
Studies addressing very early exposure to music in (extremely) preterm born infants and a possible outcome-transfer to long-term effects on cognitive functions such as executive function or learning are rare. Therefore, it is crucial to understand music itself and how it affects, touches and possibly influences brain and cognitive development, in a broader context. Being able to trace musical stimuli through the brain and linking this activity to a possible cognitive effect provides a means toward understanding neural development across the life span. Research on the development of the human brain has indicated that the brain reaches its full level of maturity at an age of around 30 years 33).
Within these crucial years of development, the frontal lobe is one of the last to reach its full maturity 34). With the prefrontal cortex being the primary seat of executive functions, correlated with a possible influence of music (a combination of listening, playing and improvising), this area has the potential to influence the developing neural structures through the very complexity of the music itself and the conditions within which it is provided.
Processing music engages long fiber tracts in the brain and overlaps with regions responsible for executive functions, and we expect a stimulation of executive function when perceiving and performing music 35). Understanding the influence of music on executive function can, in turn, provide insight into pathologies later in life, which manifest in a form of executive dysfunction. Music therapeutically informed interventions hold the potential, to stimulate the brain, supporting processes of neural plasticity, and can offer an enhanced start into life for (extremely) prematurely born infants, who have entered this world with so often physical and cognitive disadvantages stemming from birth trauma and/or deprivation.
Music and Brain Function
Early exposure to music can have strong influences on cognitive reserve and development later in childhood 36). As there is limited research on the development of executive functions in preterm born children (regarding their age for neuropsychological testing) arguments from the literature which indicate improvements in executive functioning in relation to music training and exposure 37). This approach affords the tracing back of steps potentially contributing to neural development as informed by neural plasticity, utilizing large published data sets; a method that borrows from historical and anthropological research.
Frontal brain regions mainly process anticipation and expectation and the execution of musical thought during the event of listening and execution. Furthermore, they relate to music improvisation, which also relates to the amygdala and the hippocampus. Of note is the dorsolateral prefrontal cortex (dlPFC), which plays a crucial role in improvisation as well as in learning and memory, connecting deeper brain regions with frontal regions via the thalamocortical-thalamic loop. When it comes to music learning and its likely associated executive functioning, it is crucial to examine the difference between music listening and music playing. Both listening and especially playing music, activate a wide array of brain areas. These neural activity networks, however, should be linked in kind to cognitive processes. Understanding the differences between mere exposure to music and playing music, within a collaborative signal-reading environment, can have a significantly different outcome, especially as studies propose causality between music and far transfer domains 38).
Linking back to prematurely born infants, to have a deeper understanding of the impact of musical learning and its capacity to affect learning in neurologic development, it may be useful to distinguish four modalities of music participation: (1) passive listening; (2) active listening; (3) music-making; and (4) improvisation. All four, even though consecutively building upon each other, translate uniquely and distinctly to a possible effect on cognition and should, therefore, be considered as influential when analyzing the effects of music on brain function, emotion and behavior.
In premature infancy, the listening conditions might translate well within a quiet or active alert state context, and the musical vocalizing might translate to a contingent singing 39) or infant-directed singing 40) exploration. In such contexts, the in-the-moment improvisatory experience might be indicative of a developing repartee and one whereby the music therapist is singing back the premature infant’s vocalization, strategically on the exact pitch of the infant’s tone. Eventually, the premature infant might absorb the vibration percept and create a new tone or an interval of two tones outside of the tone of the formerly set condition. This may unfold without prompt and occur seemingly suddenly, such as a crying sound with accented phrasing, or a comforting sound wherein the rhythmic meter of the plosive mouthing sounds indicates exploration 41).
References [ + ]


